Sunday, January 26, 2014

Brick...

Well, I am closing in on this monster.   All of the brick walls are made and 4 or the 6 panels have been carved.  I will get the last two done early this week and they can all be painted Thursday, when the weather warms up again.

The process of making a brick wall is really pretty simple, just tedious.  I start with a basic luan flat in the shape that I need the wall. I then apply a layer of styrofoam. Since the profile of brick and mortar is not necessarily heavily rusticated, I can use fairly thin styrofoam. In the case of these walls, I used 3/4" thick sheets.  This is more than thick enough to carve the pattern and age the brick because the surface of even a very weathered brick wall is still pretty flat. It will create decent shadows. 
 If I am doing stone, I use 2" for a typical, laid up stone wall. The mortar joints in stone and the irregular surfaces require more definition.  

I stripe the foam surface with a Sharpie in the brick pattern.  Normal bricks are 2 1/8" high and 7 5/8" long.  These allow for 3/8" mortar joints to become 8" long and 3 courses high makes 8" high, so that they align with concrete blocks and other standard masonry units.  In carving brick walls, I don't have to be quite so precise.  I measure the courses off at 2" tall and 8" long.  It makes the math a lot easier and who is really going to know the freaking difference? Using a hot knife with a V-groove blade, I cut the mortar joints in along my black lines.  
For many people, this is as far as they go and they think that they carved foam...not so fast, buster.  The edges of bricks are never nice and smooth, especially in old industrial loft buildings in the East Village.  These buildings are beat up and weathered.  So, I switch to a 4" flat knife blade and drag it along the edges of the grooves creating an irregular edge.  Gouges at the corners make the bricks look chipped and broken.  
Finally, I use a heat gun over the surface.  This does a few things...first, it melts away all of the jagged little edges that do not appear naturally in a brick wall.  Second, it opens up imperfections and pores in the surface of the foam, giving it a texture instead of being slick.  Finally, it melts the surface just a bit and when it cools it has closed all of the pores leaving a thin hard shell which is easier to paint and much more durable. (Melanie has a lot of heat gun experience!)
So, with the walls nearly complete and ready for paint, I can turn my attention to the next task...payphone!  More to follow later in the week. I post an update when the brick is painted...


Until then...Rob

Friday, January 17, 2014

Rusty metal

I have been quiet for a week.  Last week, there was a flurry of posts as flashy things were done and found. It is easy to write about your progress when you have pretty pictures to show.  The past few days have been much more detail oriented and that leaves me with less to show, even if there is just as much going on.

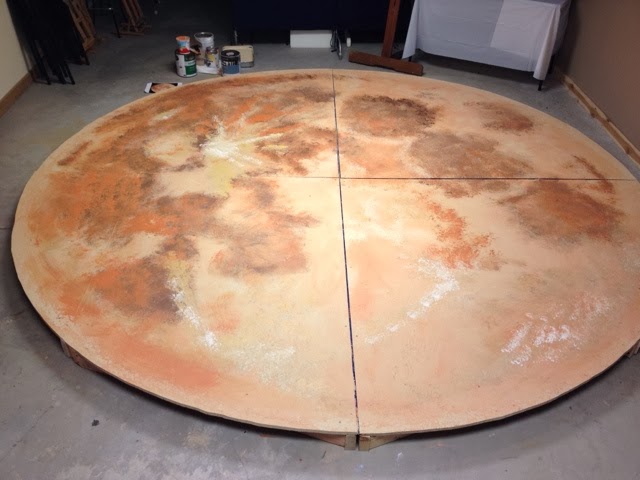
After finishing fabricating all of the elements to appear as rusty metal, Melanie and I spent an entire afternoon just painting everything gray.  Isn't that exciting? GRAY!... but the gray base coat becomes the voids in the finish paint, the shadows, the depth in the textures.  It is a necessary first layer.  In the past, I have experimented with other base colors and, for some specific applications they work.  For wood, I almost always start with a chocolate brown and then layer on the lighter tones for grain. For plaster, it is is a lighter gray with shades of white and cream over.  For brick, I used to try the light gray/ off-white of mortar.  That just doesn't work. It makes the brick look cartooned, even if it is technically more accurate.  But more about brick painting when I get the brick ready for paint over the next couple of weeks.

Now our set is a little abstract, with our elements floating against black. So, I need to use fairly saturated colors in order to keep the scenic elements from melting into the black curtains behind them.  If we leave too much dark gray exposed, they will vanish when lit on stage.

For rust, we start with a scratch coat of a medium burnt sienna or an orange brown.  I call it a scratch coat because it is applied with a beat up, frayed old 4" brush and literally scratched around on the surface.

 Kind of like dry brushing, except that you push, swirl and dab the brush instead of dragging it for dry-brushing. The next layer is a mixed-in-the-brush dabbing of red and yellow, making all kinds of shades of red, orange, salmon and yellow. Finally a little spattering of cream and black here and there because, in the real world, a surface is NEVER a solid, even color and texture. It always varies in spots.


On the railing sections, this technique is all we will do. They have enough going on with the wire...visually interesting enough. They just need to pop out against black.


For the door, we start the same way, but a steel door in an old industrial building was likely originally primed and painted some color. This paint has long since faded, chipped, and peeled away, leaving only traces of that color here and there.  Because this door will be in a red brick wall and has the reds and oranges of rust, using a forest green as that long-ago paint color gives us a complimentary color and subsequently more visual depth.


 The rolling shutter door would have a steel track or frame that may have been painted, but the shutter itself was likely galvanized.  Galvanized metal weathers to a streaky gray. But there is always spatters of stuff, water streaks, bits of grease that would have been applied over the years to keep it sliding and coiling. So, the corrugated plastic panel portion of the shutter is left more gray, but smudged and aged.


The columns that support the fire escape platforms too are mostly rusty steel.  But, as I described in a previous post when I talked about the inspiration for the aesthetic of these posts, they are encased in "concrete" which has been painted safety yellow at some point but has seen much wear and tear from cars and weather.  So, there is cream, gray and yellow worked together.  Then the rust from the posts would have run down on the to concrete, staining it where the steel sits on the concrete.


That brings me to the industrial loft windows floating above the fire escape.  They are in an implied wall, so are really just flat windows.

I won't actually shine stage lights directly on these windows because then you can see that they are fake, flat panels, strung up in space.  Instead, I want these windows to glow in the reflected light that bounces up off of the rest of the set.  

They are painted just like the rest of the rusty metal elements. Then we stretched mylar sheets behind the mullions and stained these sheets with a water color wash to make them look dirty.  Finally, Gary is seen drawing "cracks" in some of the panes with a gray marker.

You can see in this picture, that the windows are backed with a box that tapers from 12 inches deep at the bottom to 4 inches deep at the top.  The inside of this box is painted white.


I purchased two LED RGB strip lights that are just long enough to attach to the 12-inch side inside the box and wash up the mylar from behind.


With these lights tied into the theater's lighting system, I can change the color that the windows' glow based upon the scene.

So, the rusty metal components are done and stacked at the garage door in the shop, ready to ship out.

Next comes the brick walls and the payphone.  Four weeks from tomorrow we load in.  I think that I am in great shape barring another snow-magadeon or sub-zero week.

Rob

Friday, January 10, 2014

Progressing...

Today it was a little chilly in the shop so I opted to cut in there and assemble in the art studio where it is nice and toasty.    I have a whole stack of things made, ready to paint to look like rusty steel.

The door is just a cheap, hollow-core luan door. I overlaid the door with a piece of 1/4" luan plywood and then applied 60 halves of styrofoam balls to appear to be rivets holding the panel on.

I make my own frames. This one is supposed to be a commercial door, so the frame is made to look like a metal frame.  The "casing" is only 2" wide and 1/2" thick, like a commercial metal frame.  After having to replace door knob mechanisms half way thru NOTLD, I opted for a full mortise lockest this time around.  Hoping this holds up better, although there will be no zombies pounding on the door and Dowdy will only slam is a few times. :)


The railings are just 2x2 frames with welded wire concrete reinforcing mesh stapled to the back side. These will get mounted between the "I beam" posts that hold up the fire escape.


Laid out on the tables are the decorative covers that will hide the four platform legs on the downstage side. The rest of the legs are hidden under the platforms or behind walls and will just get painted black.  
These covers are the ones that I posted the drawing for previously.

This weekend, I will make the rolling shutter door that I added to the design on the loft apartment side of stage.  Then all of this stuff will get base painted dark gray followed by 3 or 4 additional colors to make all of it look rusty and weathered.  Pics will follow after painting.

I need to get the two window elements made and painted yet. Then all of this can be stacked out of the way to make room to build all of the brick wall panels.  They will take up a huge amount of space in the shop because they have to be carved all at once so that the pattern aligns between panels.

Load in is 5 weeks from tomorrow.  I should be on target to get everything done unless we have another long round of extreme cold that makes being in the shop unbearable...then I will have to regroup.

Till next time...
R

Thursday, January 9, 2014

The first of the props found!

So, part of my job with doing the set and lights is finding all of the funky things to go on the set that make it real.  Now, I have a large collection of crap to choose from and my father has even more.  Sometimes I have to beg, borrow, steal or buy something that we need.

A significant amount of action in RENT, particularly at the beginning of the show, takes place at a payphone on the street.  I had two payphones available for borrow. Unfortunately, both were rotary dial phones...too old for the 1990's and not likely to be installed outside on the street.  So, I went shopping to the great electronic flea market...eBay!

That should do...and still cheaper than the antique TV for Night of the Living Dead! 


I want it in one of the pedestal stands with the aluminum rain guard that says "PHONE" across the front. Those things are PRICEY! I guess they are popular in man-caves and they are several hundred $$$ on eBay. So, I will be making one in the scenic shop out of plywood and chip board...who'll know the difference, right?!?


Next item on the agenda...the script calls for Mark to be running around NYC filming a documentary on 16mm film.  Now, I'm kinda an old guy and I remember this stuff.  Growing up, my dad was the AV coordinator for a metro-east school district. Part of his job was to go to the football and basketball games and film them for the team to review. Now it is all digital, but in the 70's and 80's it was film. As a kid, I would go with my dad, climb the ladder to the top of the press box and sit there while he filmed in 16mm. So, I knew that he had a tripod and he used to have a wind-up camera.  A rather involved call to him turned up...


He couldn't immediately lay his hands on the camera, but told me that I was welcome come by and go through a garage full of boxes of stuff from the past 20+ years to see if I can find it...maybe this weekend.

Scott also asked for a 16mm projector so that Mark can show his film at the end of the show.  Low and behold...
It is over 30 years old, but even the bulb still works...waddaya know? And he had a film that we can run thru it. As long as no one can see what the content is, it should work.

I need to track down an old early 90's computer and 14" green-screen monitor for the desk yet but have a lead on that.  

Once we get moved into the theater, I'll pull some furniture that I know I have available. We will definitely put out an all-call for chairs. Scott wants 16 on stage and I suggested that they shouldn't all match.

More as I track it down...
R

Tuesday, January 7, 2014

Refining the design

I wish that I were a genius and could just pull a brilliant design our of my backside the first time without needing to make some adjustments.  But, it just doesn't happen that way.  After a couple of weeks of looking at the sketch that I previously shared, I couldn't help but to think that something was not quite right.  The set seemed out of balance, like something was missing.  It seemed heavy and detailed on the stage left side. The "street" had brick walls, payphone, and the strong vertical of the conceptual tree.  The "apartment side was just furniture against black.
It needed something else to help the apartment to be a little more defined.  And yet, we will need to use this area in other scenes because we have so many people on stage for company numbers. So, whatever I add cannot be interior specific and not even location specific.

I did something that is usually a big no-no for me when I am designing a show. I watched the movie, mostly because I don't really know the show all that well.  A couple of set details caught my eye that are consistent, especially as I recall the set for another current show set in a neighborhood in Manhattan...In The Heights. A roll-up security door and pipes.  

So, I went thru the flat inventory from NOTLD and picked a few components that can be repurposed and repainted. Then designed a roll-up door to fit between them.    Add a few pipes including reuse of the pipe from NOTLD and the stage right side is now stronger.  

Next my attention turns to the posts supporting the fire escape/balcony.  After more studies of the grand ironwork that winds through the streets of NY and Chicago, supporting the transit systems, I realized that there was an excellent aesthetic opportunity.

These have lots of iron brackets and reinforcing plates at joints.  They also have concrete encasement when they set in the street to protect the steel columns from passing cars.  

So, instead of just a basic post, I detailed a cover to go over each of the downstage posts which reflects some of the character.  I hope that, by adding some details like these, the audience will more quickly "buy in" to being in this gritty NYC neighborhood.
We were able to work in the shop last weekend, just before snow-magedon hit. We got the door fabricated and ready for paint and started the post covers. Right now, it is just above 0-degrees in there and I am not immediately inclined to spend a great deal of time at the saw.  But, by the weekend, the temps should be better and we can get a few good days in.  It should be easy to get those finished along with the railings and the rolling door. Then all of those can be painted like rusty metal before moving on to brick walls over the next couple of weeks.

More as it develops...
R


Thursday, January 2, 2014

The work begins...

It has been two months since my last post.  I realize that I have been a little negligent, but it doesn't mean that nothing has been happening.  In addition to the holidays, I had a couple of other theater commitments that have had me preoccupied.  In the mean time, I did work through the design for RENT.
As I had mentioned in my last entry, Scott's one request was for a large, raked disc / platform center that could serve multiple functions, which I included.  

I always feel that multiple levels enhance the play-ability of a set.  It allows the director and choreographer to layer the cast visually with no one being lost in the back.  Because Rent takes place in the East Village and fire escapes are commonplace, they make a perfect aesthetic for a raised section upstage.  So, I included an "L" shaped platform, 6-feet high, upstage with a stair, dressed like a rusty fire escape.  The band can be set under/behind this platform...visible, but tucked out of the way from Scott's flurry of blocking activity.

Another aesthetic quality of the buildings in the East Village are the big windows and brick facades.  So, I incorporated two large windows suspended above the band.  They will have frosted mylar for "glass" and built as light boxes.  I procured four RGB LED flood lights that we used on the band for NOTLD.  I will use two of these to light each window from behind.  That way, I can change the color that they are glowing to be consistent with the scene and location.

Finally, there are two predominant locations in the show: Mark and Roger's loft apartment and "on the street".  I have separated the sides of the stage with stage right being the loft and stage left being outside. The loft interior is essentially defined by a desk with an old-fashioned, 90's computer and a stack of manuscripts as well as a wood stove with a flue pipe that appears to vent up through a skylight (a stage description from the script), and a hanging Japanese lantern..an icon from Rent.  For the street, I am using a section of brick wall with a rusty, industrial looking door, a light fixture that you might expect to see in an alley, a bench, and a conceptual Christmas tree, made by stringing lights into a triangle shape.  Finally a small payphone by the door.

After getting Scott's blessing on everything, I went shopping and got the materials to start the disc. Not being die-hard football fans, New Year's Day, my wife Kathleen and I spent the afternoon building the 12-foot diameter disc. This disc has to be made in four quadrants and bolted together once on stage. Otherwise, it won't fit through any of the doors into the theater. It has to be built like a platform because there will be times that cast members will be up on it, doing a wide variety of activities (hint, hint).  By the time the sun went down and it started to get chilly in the shop, we had all four sections completed.  

This afternoon, Sharon is base coating it in moon-rise yellow. Tomorrow, using paint, Gary and I will try to give it some of the topographic features that make our moon recognizable.  The next task will be to build the base to float it off the stage floor at table height with a slight downstage incline. 

UPDATE

Gary finished the painting of the moon surface.


After the disc is done and stored, we will turn our attention to railings, door and phone booth.  Brick walls and windows are last because they are large and will fill the shop.

More next week as things progress...
R