Thursday, May 22, 2014

Finishing touches

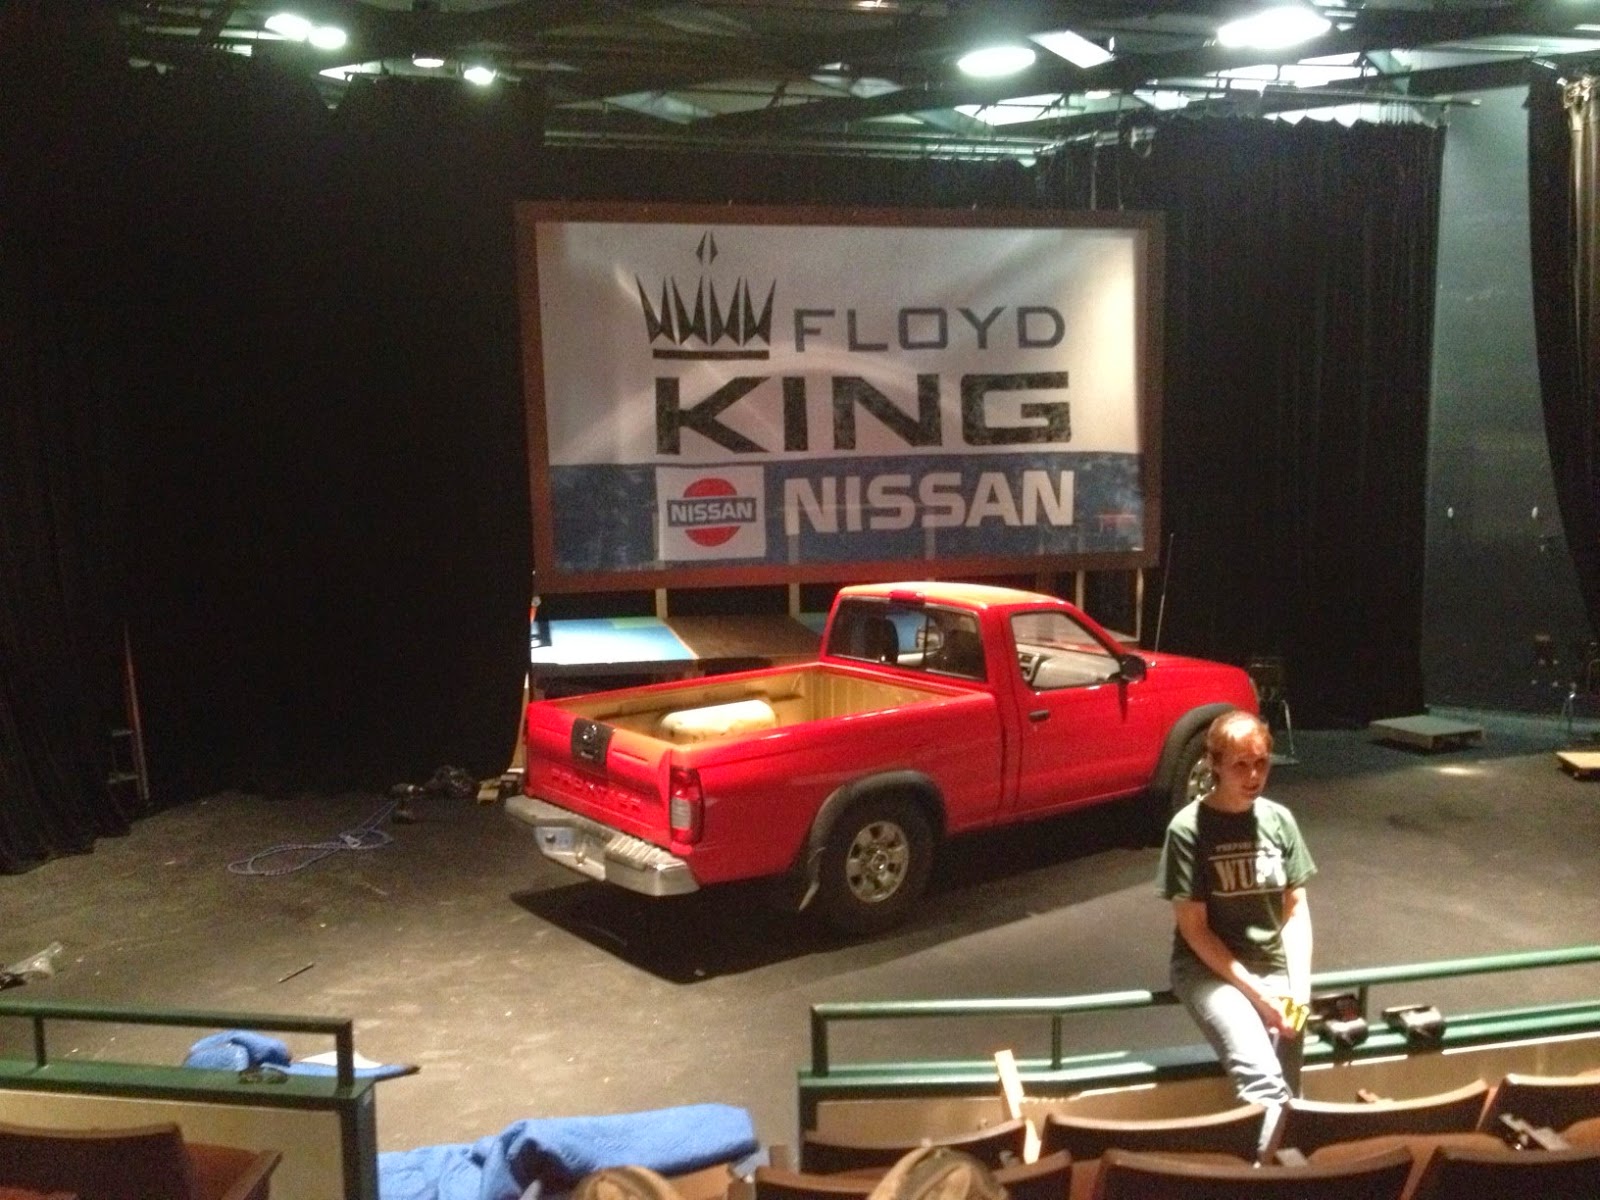
Last night, Gary, Kathleen, Patrick and I put the finishing touches on the set.  It is very strange to not be doing lights as well.  I feel like I'm not doing part of my job.  On the other hand, it is nice to have the stress off.

Monday evening, Melanie and I made the "tonneau" cover for the bed.  Originally, it was going to be a full platform that the cast could be up on, but after blocking the show, Scott decided to not have anyone actually up there.  Marcy and Ryan sit on the tailgate, but not in the middle of the bed. So, we used luan and a 2x2 frame and made a panel that just drops in and covers the bed. This is a good thing because the inside of the bed was is ROUGH shape.  When we bought the truck, it had a plastic bed liner, which I pulled out and threw away, because it was going to be in the way of the platform.  Too bad.  If that were still around, I would have put a coat of black paint on it to make it look new and left it in.

Last night, I rolled a coat of flat black on the bed cover and then painted the floor of the band platform so that it is ready for musicians to move in tonight.

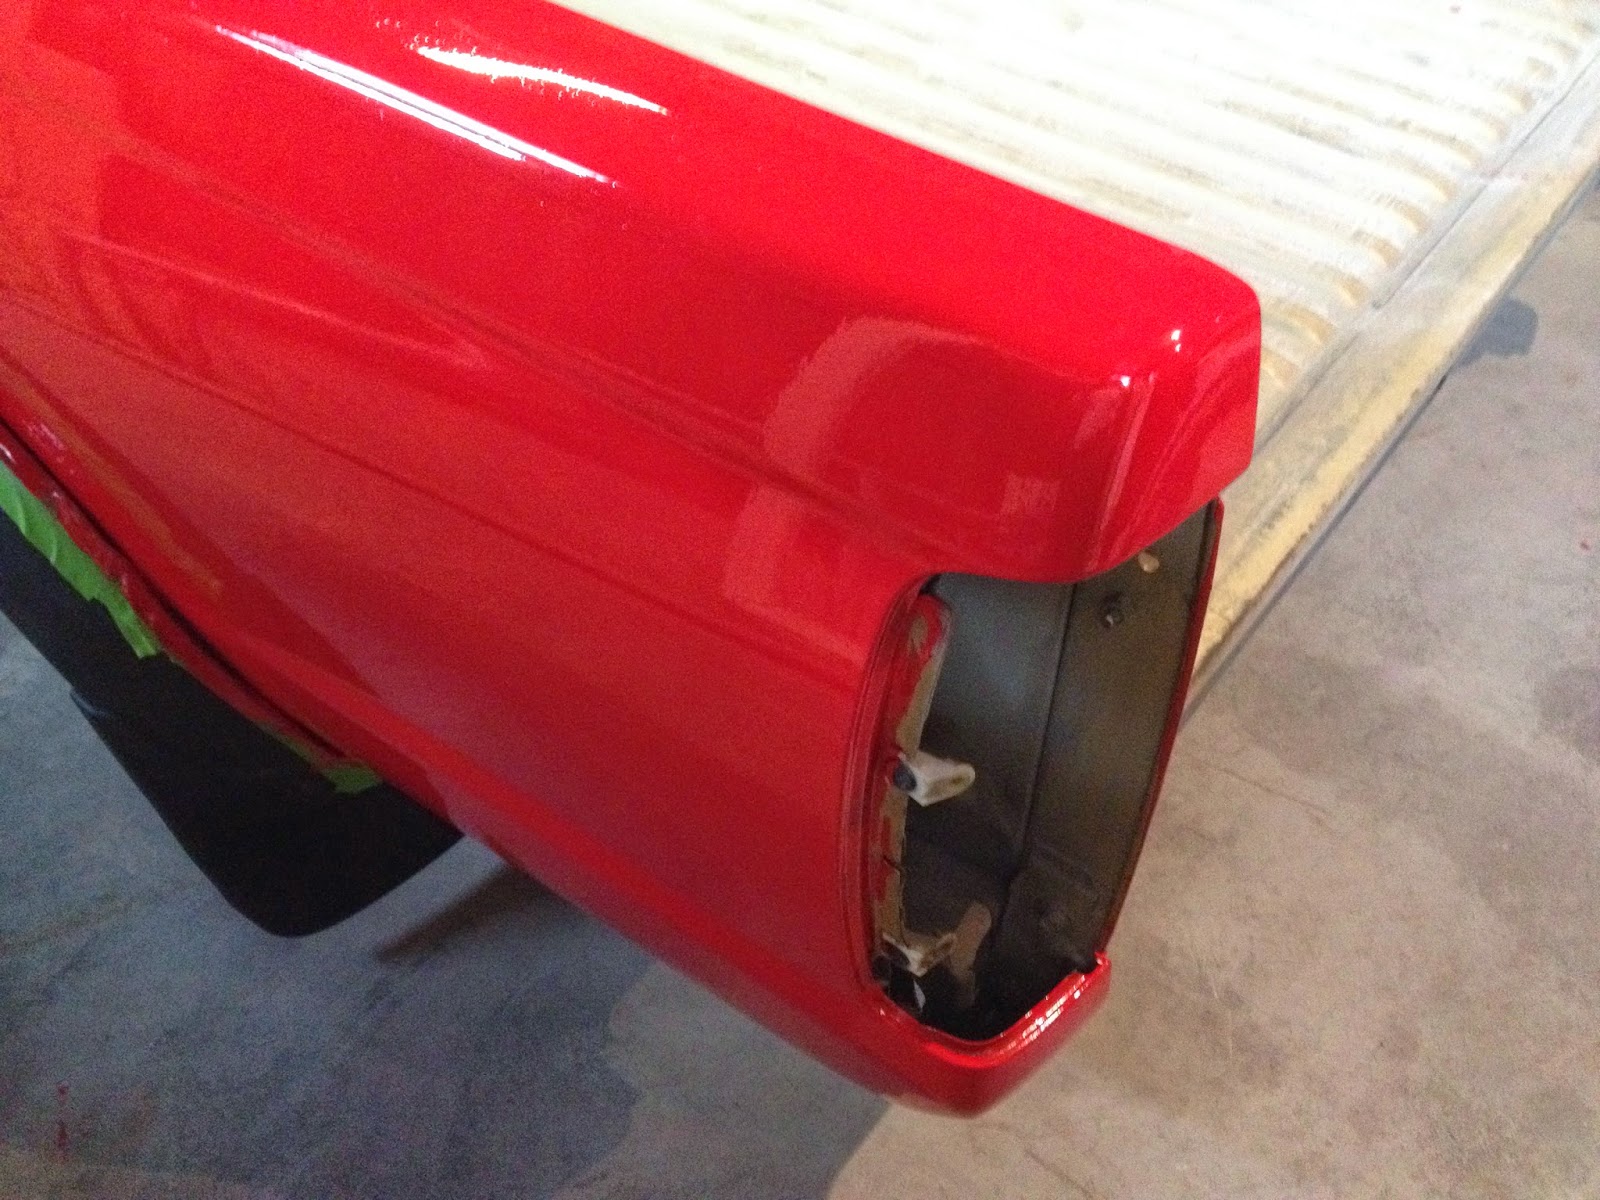
I have been unhappy with the bed of the truck ever since we first assembled it in the shop. Notice in the pic on the left how the space between the cab and bed is wider at the top than the bottom? It always looked like it was sagging.  So, I cut a 2" shim and last night, Patrick jacked the bed up and put the shim in.  You can see in the pic on the right that it looks a LOT better now.

Gary added a little rust to the lamp posts and billboard frame and painted out the bases to look like beat up concrete.  He then attacked the floor with the texture roller and several colors of gray and cream to make it look like weathered asphalt.  Finishing touches included cracks, a pool of spilled oil and a tire mark.

Patrick and Kathleen hung flags on strings above the stage
and out into the first couple of rows of the audience.  It brings the top down just a little bit on the parking lot.  I think that with stage lights and the parking lot lights on, it will feel like a real car lot.

The last thing we did was to move in one of the typical tan steel desks that everyone used in the 70's-90's offices.


So, that finishes my work on "Hands on a Hardbody".  It is now up to the cast, band, Ken and Kerrie to bring it to life.

Can't wait to see it all come together.
R

Sunday, May 11, 2014

Loading in the BEAST!

Well, no one said that it would be easy...  


We pre-loaded one trailer on Friday with all of the small truck parts, the platform legs, the parking lot lights and part of the bill board.  I quickly realized that this was a two-trailer job.  The bed and cab pieces were nearly a foot wider than Larry's trailer and longer than his trailer.  So, we rented a 6x12 U-haul trailer and towed it with Gary's RAV4.

Melanie, Larry, Gary, Brian Scheppler and Patrick showed up at the shop and we got the bed and cab on the U-haul trailer. Turns out that once we put the bed and cab pieces in the U-haul, it was "full" too.  Oh, we could have crammed a lot more in. For other shows we would have.  Pieces made of wood and painted with latex are easy to touch up if they rub together and scuff.  The finish on the truck is a different story. Even with the second trailer, we couldn't fit the wooden frame on the first load. :/


We pulled out of the shop at 10AM. When we got to the theater at 10:30, Todd, Ray, Marshall and Allison were waiting for us.  We quickly unloaded the two trailers and hauled the small stuff upstairs.  Then Larry too Brian, and Allison back to the shop to load up the frame and bring it in a second load.  What a pain in the ass...

Meanwhile, the rest of us stayed at the theater, drug out platforms and supplies and put the band platform together. Still waiting for the second trip to return, we wrestled the cab in the building, thru the halls, up the stairs, and into the theater.  It wasn't terrible.  So, after a rest, the gang decided to try and tackle the bed as well.  Got it to the bottom of the steps, tried to get it on the elevator and it was ONE freaking inch to big to fit! Son of a Bitch!  So, we waited for the rest of the muscle to return

On their return, the bed was brought up the steps and into the theater.  The wooden frame, on the other hand, it was decided to bring up the fire escape an thru the stage door.  That was quite the adventure.  I am still not convinced that it was easier than bringing it in the front door, thru the halls, up the stairs, and in. But, whatever... I just wanted it IN.

While they fought with the bed and frame, I quickly put the billboard framework together and Patrick and I got it hung so that it was out of the way for the truck parts in the middle of the stage.

With the billboard up and the truck parts on stage, Marshall, Todd and Ray bid us adieu.  Allison began to tackle getting the scrim on to the billboard frame while Brian, Patrick and I began putting the truck back together.

The wheels went on first.  Because we took the casters off, the wheels would touch the floor and I wanted to make sure that they were on before we began to really add the weight to the frame.  Next we set the cab in place, followed by the bed.  It seemed as though it would go right back together the same as it had come apart.  Yea, so much for that.


The doors were the next thing that had to be tackled and they have always given us problems.  When we put it together in the shop, it too us two evenings to get them on right.  Now, you have to understand that, in order to be able to get the cab thru a single 3' door, I had to sacrifice somewhere.  To keep the cab intact, it would have been the equivilent of a 4'x4'x6' cube...not going thru the door and heavy as hell to move.  So, we had cut it at the floor behind the seat and at the top of the firewall.  This meant that we no longer had the front door post with the factory-tapped screw positions defined.  So, we had to make that up out of wood.  Wood flexs, shifts, splits and generally is just not as reliable as steel. And that wood door post was supporting the weight of the door when it is open. But, I digress...


We finally figured out that we had set the cab 1/4" to the right off from where it needed to be, which thru the door posts out of square and the doors wouldn't close!  Frustration mounted and I got pretty testy.  I apologize to Melanie, Patrick, Brian and Allison for venting my frustration. I have FOUGHT with this damn thing for weeks and again it is giving me problems...

Once the doors were fixed, the rest of it went together pretty smoothly. The holes all aligned and it fit right back together.


While all of this cursing is going on, Melanie and Allison were having frustrations of their own.  Scrim is a bitch to work with if you are painting something on it that needs to be recognizable.  You see, it stretches...A LOT!  Compounding that, I bought loose cut bulk scrim from Rose brand. Two edges were factory and two edges were cut.  If you have ever had fabric cut, you know it is never perfectly square and even.  Then, of course we didn't paint the graphic on square with an edge.  The only thing that I knew was that the graphic had a horizontal edge that formed the field of blue on the bottom. That line had to be parallel to the bottom of the billboard frame. After two false starts, the ladies figured out a system, got the thing roughly tacked in place and then began the painstaking process of pulling and stapling on small area at a time so that the letters didn't deform, bow or run uphill or downhill.

We wrapped up all of that an sat down in the seats for a short admiration of our work at 6:15PM. It had been a long day. We turned off the lights, locked up and headed back to IL for a drink and BBQ on me!  Long-ass day!!!


Today, Melanie and I will go back in a few minutes, finish skirting the billboard, hang the other parking lot light and then thoroughly clean the truck.  It needs to look like a new truck and right now it is GRIMY!

More later... In the mean time, I'm off to LA for the week. I need to get away from this project. It has been a grueling 5 weeks of work and I need a break. The cast can get in there this week and put their hands on it and get used to their new space.
R

See you at the theater.

Thursday, May 8, 2014

Billboard update.

In my post a day or two ago, I ended with talking about designing and executing the billboard.  Today, we projected it on to the scrim and traced the design on with a Sharpie.  I then stretched it out on the floor of the art studio on top of some brown paper and Sharon and I went to work painstakingly filling in the color.


Periodically, we had to lift it as the paint dried to keep it from sticking to the paper below.

We made an executive decision to stop on the field of blue at the bottom once we got all of the letters and logos outlined so that it could dry overnight.

We suspended it off the floor by binder clipping the four corners to the back of stools and let it air dry.  This will minimize the openings in the scrim that are closed with paint and make it the most transparent.

Tomorrow morning, I will lay it back out on the paper and roll on the rest of the blue to the bottom and let it dry.  It looks like it will be done to hang this weekend after all...R

Wednesday, May 7, 2014

Last minute things before load-in

I have been scrambling the past week or so, trying to get things done before we load in on Saturday.  When it was all said and done, the truck took longer to finish than I had hoped. My goal had been to have it completely done and ready to move by May 1.  But that deadline slipped a little bit as I still worked on it last Saturday and Sunday.


SATURDAY
On this truck, the wheels need to appear to support the vehicle, but in actuality, they will hang on the frame and weight is carried by four legs.  We fixed plywood discs painted black at the end of each wooden "axel" to bolt the wheels on to. I spent 2.5 hours on Saturday morning trying to figure out how to deal with the lug nuts.

Because it is a Japanese truck, they are, of course, metric versions of 1/2" nuts.  But Imperial won't fit and our hardware stores are pretty limited in their metric selections.  Turns out that they are 12mm and there are 3 different threads for 12mm. 12mm x 1.5 threads/mm is the most common size.  Naturally, the lug nuts are 12x1.25 threads/mm. Those bolts are $4 each!  So, I explored buying new American lugs. But they come in packs of 20 for $30 and these wheels have 6 holes.  So, it is either $100 in metric bolts or $60 in new lug nuts.  I compromised...no lug nuts. I cut off the 1/2" cheap bolts that I bought and put on basic nuts.  Looking at the pic of the wheel below, I think that they will pass OK.

Saturday, while I finished the mountings for the wheels, Kathleen painted the aluminum rims.  I know that sounds like sacrilege but they were beat up and stained.  A coat of silver paint made them look good, at least from a distance.  I purchased four replacement chrome hub covers on eBay.

After getting the wheels worked out, finally put the truck behind me and went home.

SUNDAY
Patrick had his first tech rehearsal for a production of Spamalot that he is in and Melanie had a Special Olympics competition Sunday morning, so I started the day by myself.  Well, almost.  I brought the supervisor with me. She guarded the door while I began the next task...the whole rest of the SET!

My design calls for a pair of parking lot lamp posts and a large billboard upstage. More about the billboard later.

Most people don't pay much attention to parking lot lights except when they back into the concrete base.  They are actually fairly simple geometry and proved to be easy to make.  They are not much more than an aluminum "shoebox" that hangs off of the side of a square aluminum pole.

I made the light fixture out of 1x6's and a piece of 2x4 as the bracket.  The pole is a pair of 1x4's held together with two 4" wide strips of luan.  For the concrete base, I started with a 12" diameter sonotube concrete form and then capped it with some 2" styrofoam.  A little carving, sanding and a coat of paint and they have the right shape.  Gary will make them look like concrete after we install them.


I found a really cool paint at Home Depot that makes them look like the bronze aluminum. Melanie base coated them with chocolate brown and then Monday evening, top coated them with this bronze paint. It gives them a nice, dark metallic appearance.


Another project that had to be done was to make legs for the platforms that will hold the band.  They can be made on site, but if I pre-make them, setting up platforms goes infintely faster and smoother.

It took only a couple of hours on Tuesday evening to cut 2x4s and screw them together into a neat stack of legs, ready to haul.


Today, my attention turns to the billboard. I think that I have held this one until last because I hadn't made decisions on it yet. But I am at the point where I must. I knew that it was going to be painted on scrim so that the band could see thru it.  I knew that the band platform was 16' wide, so the billboard is 16' wide.  I bought 3 yds of white scrim.


I want to make a frame that hangs from the lighting structure overhead, but appears to stand on legs. So, tonight I will make the pieces that form the frame. I will also make some fake legs.  The thought is to staple black fabric to the bottom of the frame to hide the band platform and then apply the fake legs in front.  Then the scrim will staple to the back of the frame.


After designing the framework, I had to decide on the content.  Since Floyd King Nissan doesn't exist and doesn't have a real sign, I had to turn to the Internet for inspiration.  After a bit of playing, I came up with the following.

We will paint it on to the scrim in the art studio and then I will install it later, after the frame is in place.  If  that doesn't happen this weekend, I have a week before the band moves in and makes access to the back of the billboard a problem.

Friday afternoon, Patrick and Larry are coming to the shop and we will disassemble the truck and wrap it in moving blankets for the trip over.  I will feel SO much better when this thing is on stage and assembled!!!

More after the weekend.  If anyone has time, please come to the theater Saturday at noon to give us a hand.  The bed and cab of this truck are heavy and awkward to move.  It will take a few muscles to get it in place.

See you at the theater! R

PS...the components for the billboard are done and base painted.  They will get a coat of "bronze" tomorrow and they will be good to go...


Monday, April 28, 2014

Painting a truck

Ugh...
There is nothing more tedious than trying to paint a vehicle and make it look like a factory finish.  In fact, I am convinced that, unless you are an auto body shop with all of the experience and equipment, it isn't going to happen.

The truck IS red. At least that it true.  In pictures, it looks pretty good, but up close, it is NOT a factory finish.  We had an impossible time getting it to not orange peel.  I hope that from the audience, it will be reasonably acceptable and not distracting.

FRIDAY
We did all of the due prep work.  Patrick and I played with Bondo for the fist time.  There was some hail damage on the roof of the cab, and a significant crease in the tailgate as well as a serious abrasion on the plate around the handle.  After pricing a replacement plate, and a tailgate, we decided that the best way to go was Bondo and prayer.
Patrick cut an opening on the inside of the tailgate and popped the crease out as best as he could. We drilled a few holes in the bottom of the crease so that the Bondo would seep through and have something to hold on to.

We hit the plastic plate with the disc sander to smooth down the abrasion.  Then mixed about a tennis ball amount of Bondo and worked it in.  That shit sets up FAST.  30 minutes later, we ground it down with the sander and applied a second coat.  30 minutes after that, we finish sanded it and applied some primer.

We sanded every square inch of gold paint with the sander to make sure that there was no trace of wax, oil or tar. It also gave a good tooth for the the new paint to grab.  Final task was to spot prime any bare metal and let it dry overnight.

SATURDAY
I cleaned as much dust out of the shop as I could and then began wet sanding all of the surfaces using the finest foam sanding block that I could get.  After wiping it down, it was exceptionally smooth.  I think we did the prep work quite well.

A photographer from the Belleville News Democrat came by a little before 10 AM to take some "action shots" for an upcoming article, but there was no action going on, so he left and said that he'd be back at 1PM.

We let it dry while we got ready to paint coat #1.  Two foam brushes, two 4" foam rollers and two plastic hand-held paint trays...we mixed as little thinner into the quart of bright red paint and began.  The first coat took about 2 hours to apply. We wrapped up right at 1 PM...no photographer.

We stood and watched the paint dry for about 45 minutes before the photographer finally arrived.  So, we had to make up some "work" for him to take pictures of. We pulled out the gallon of black and started painting some of the exposed wood framework.  That was good enough for his pix.

After he was done and gone, we cleaned up and left it to dry.  That paint takes about 12 hours to dry for re-coating.

SUNDAY
Kathleen and I headed to the shop about 10 AM. Patrick and Melanie were not able to be there before 11 AM, so we thought that we would get a jump-start on the second coat.

We wet sanded all of the red surfaces, knocking off the few spots of dust that had landed in the finish.  Patrick and Melanie hadn't arrived  yet, so we continued painting all of the exposed wood frame black.  Still no Pat and Mel, so we dove in and applied the second coat, same way as the first.  Second coat took a little over an hour.  We finished just as Melanie arrived.  Headed home around 2 PM.


Some areas of the finish look really good, even up close. Some areas I am just not happy with.  I have about 1/3 of a quart of paint left. My plan is to sand and re-coat the passenger door and rear fender on Monday evening.  Hope that third time is the charm...

Wednesday evening, we will pull the tape, reassemble the pieces that we took off, and polish things up.  We need to cut and fit the new Lexan windshield and then work out mounting the wheels.  I hope that when we leave Wednesday evening, we have what looks like a finished truck!

R

Wednesday, April 23, 2014

Prep and paint

Tonight, we begin the painstaking process of prepping for paint.

On a normal set, that would involve...well...nothing.  Slap a base coat on and get ready for some "latex magic".  Oooo...  that could be taken a couple of different ways, if my mind weren't so innocent.


Painting a vehicle is, or at least SHOULD be a little more painstaking. Since this vehicle will never see the tough environment of the street again, its paint job doesn't have to be quite as thorough, but we still want a smooth, glossy finish that looks like a new truck. So, it needs to be done with some care.

We will start by sanding the entire surface to be painted. There are dings, dimples and grit  from years on the road. 

The original paint is oxidized, chipped and faded and there are a few rust spots that need smoothing out.  Next we will use Bondo to fill in little dings, dents and rust spots.  Then that will have to dry for a couple of days before we can sand it out flush with the adjacent metal.


The other project that will hopefully be tackled tonight and Friday is to clean all of the black plastic body moldings and give them a light coat of flat black spray paint.  Then they should be ready to re-install after the body panels are painted red and cured.


Probably Friday evening, we will sand down the Bondo patches and spot prime any metal that we bared with sanding.  There are wear spots along the top edge of the fenders on the bed.  They were caused by the plastic bed liner that we removed and threw away because it was beat up and faded.  I plan to just use spray Rustoleum primer for light rust and previously painted surfaces.  That should dry overnight. Saturday morning, we will finish sand the whole thing with 400 grit sandpaper.


According to UPS, my Epiphanes Bright Red yacht enamel and thinner is in Ohio somewhere and should arrive Thursday afternoon.  Just in time for coat #1 on Saturday!!!  

More pix after this weekend, I promise...
R

Monday, April 21, 2014

Almost ready for paint!

We had a VERY productive week in the scenic shop.  The truck has made great progress.  All of the body parts have been fitted and anchored except the bed and rear bumper.

FRIDAY EVENING
Kathleen, Melanie and Shelley worked on the interior of the truck. The headliner and seat needed to be cleaned and painted after years of smoking and who knows what else.  We actually ended up spray painting the seat black to hide the stains...

The doors were so heavy that they kept causing the wooden door posts to fail, so we gutted them, removing glass, all mechanisms and a huge steel weight in the bottom of each.  After remounting them, they were remarkably easier to handle and closed better.  We then focused our attention on working out the rest of the font end.  Fenders first, then grill.


Trying to figure out the geometry of the front end of this truck is a challenge.  Nothing is a right angle and all of the parts bolted to a frame that is now gone.  Very little bolts together.  Fortunately when we cut the windshield frame from the fire wall, we left the two bolt holes that held the top of the fenders.  That and the front edge of the doors, tells us where the fender needs to be.  Fortunately, Nissan designed this model with a narrow metal strip between the bumper and the grill that bolts to the front of the fenders.  These three pieces became our guide for fitting everything else together.


With these pieces in the right place and a few beers down, we called it a night about 10PM.

SATURDAY
After a good nights sleep, I got to the shop and spent an hour or so just cleaning.  We had parts EVERYWHERE and no place to work.  It looked like a mechanic shop, not the neat and organized scenic shop that I normally run.  While cleaning and organizing, it dawned on me that we needed to make sure that the bumper was in the right place, centered on the frame first and then align the front of the fenders, grill and hood to it.  Remarkably, once the bumper was mounted and fenders anchored in place, the hood dropped on and was within 1/8" of being square...close enough for a stage prop.

We then had to black out behind the grill and needed to figure out how to mount the lights. A piece of luan shot to the framing behind the grill stiffened the front end. The lights mounted to it with relative ease.  The front end was essentially done.

Kathleen and Melanie both showed up a little after noon. The two of them attacked the interior, replacing the carpet and fitting the gearshift assembly back in.  Meanwhile, the seat is STILL DRYING in the sun.


With the front end in good shape, Patrick and I turned our attention to the bed.  When we built the initial chassis, the framing stopped at the axles. To extend it out to the bumper in both the front and at the back, we sistered 2x4s on top of the initial 2x6 frame, holding them with mending plates.  For the front end, 2x4s more than adequately supported the weight of the sheet metal.  When we sistered 2x4s on the back and set the bed on, it sagged...A LOT!!!  So, a quick trip to Home Depot, we replaced the 2x4s with 2x6s and that was better.


The bed is so damn heavy, that it probably doesn't need to be bolted down!  It took four of us to lift it on to the wooden chassis.  When we set it down on the frame, the casters on both rear legs flattened to the floor...sigh.  So, much for moving it around in the shop anymore.  Those casters were rated at 200 lbs each!


This isn't the first time that I have had problems with casters under a truck.  When I did The Grapes of Wrath in 2010, our truck was MUCH lighter.  I fabricated it almost completely out of wood.  The only metal on it were the two front fenders and the rims for the four wheels.  For Grapes, I choreographed the truck to move to different positions on stage as part of the scene changes.  I went through 3 sets of casters on it during rehearsals and the run of the show.

We fought for over an hour with getting four bolts to hold down the bed to the frame.  I was tired and frustrated and we called it a day.

Wednesday evening, we will finish the bed and rear bumper.  Then it is time to start prepping for paint.  Every surface needs to be sanded and the few dings need to be filled with Bondo and ground down. Some spot priming and it will be ready for paint.  I am considering using yacht enamel instead of automotive paint.  I have painted several boats in the past decade and know that I can get a smooth, level, glossy finish without all of the hassle of paint sprayers. I will probably roll it on with foam rollers.  This paint wouldn't hold up on the road, but this truck has retired from the road...

Goal is to be ready for paint next weekend!!!!
R

Sunday, April 13, 2014

The truck is reborn...

This week has been a little funny.  Wednesday night, we spent time cleaning up the pieces that we had taken off of the truck. By cleaning up, I don't mean soap and water.  There were a LOT of sharp edges on the parts where we had cut parts away from the frame and uni-body.  We also spent over an hour and removed the shattered windshield.  That will be replaced by a sheet of Lexan...stronger and lighter weight than glass and will not shatter.  But that's not happening until the very last thing, after reassembly and paint.

On Saturday morning at 8 AM, my nephew and brother in law arrived at the scenic shop with a car hauler trailer.  It took the three of us about an hour to maneuver the carcass of the truck onto the trailer.  What made it so difficult was not the weight.  Removing the body and bed probably reduced the weight by 1/3.  What made it so difficult was that I had cut the steering wheel out for use in the prop truck.  So, to turn the wheels, we had to jack up the front end, push the wheels one way or the other, then let it back down.


The overhead door on the shop is at a 90-degree angle to the driveway, so the truck carcass had to come out and be turned 90-degrees before it could be winched on to the trailer. That's what took all of the time.


With the carcass on the trailer and strapped down, there was now some room to breathe in the shop.

We really couldn't begin putting things back together until that mess was cleaned up and gone.


On Sunday morning, I picked up some lumber and was at the shop by 8:30 AM.  First thing on the agenda was to rearrange things so that I had some room to get to the tools and to load in the lumber.

Patrick arrived around 10 AM and we started building the new wood chassis that would hold the body pieces.  We basically made a box out of 2x6's that was the size of the wheelbase of a Nissan Frontier...8'-8" long and 4' wide.  The two end boards extend an extra few inches and will serve as the "axle"...the wheels will hang on them.

We made four legs out of 2x4's and fastened them into the corners with carriage bolts.  We put special, high-capacity caster assemblies on the bottom of each leg. These will be critical for moving the thing around both in the shop, and through the halls to the theater.  The chassis will ultimately be 15' long and 5' wide when all is done.  That is just a bit too unwieldy to carry without wheels.

Before the carcass left the shop, I made some careful measurements of where the body parts; the cab in particular, sat in relation to the axles. This would be critical if I had any hope of hiding the legs behind the tires.


We added a horizontal brace to the chassis underneath where the back wall of the cab would set.  We then lifted the cab on to the chassis and positioned it where it needed to be relative to the axles.  We then had to whittle and fit the supports that replaced the firewall which we cut away because of weight and size.  This extends from the underside of the windshield to the chassis.

The uprights also serve as the door posts, where the doors hinge on.

We re-installed the dash, to make sure that we had bracing where we needed it and to make sure that the luan closure on the firewall was adequate to disappear up behind the dash.

Our attention then turned to fitting the doors.  We will put a plywood floor in the cab eventually, but it must extend out several inches beyond the chassis and until the doors are on, there is no way to know exactly how far.  There will also be custom sill pieces that I will fabricate out of wood and attach to the floor.

Hanging the doors was a bit tricky. They are extremely heavy and they tend to twist the wooden door posts.  We will have to reinforce the door posts after we get the rest of the framing on.

All in all, it was a good days work.  Wednesday night we will pick up with the front fenders, the floor of the cab and door sills.  Then the grille, headlights, etc to finish off the front end.

Until next weekend...R